또 한동안 다른 프로젝트를 하다 보니, 포스팅하는 것을 잊어버렸다.
EFR32 GPIO 인터럽트는 조금 특이하다. 보통 EXT 인터럽트 1,2 번 해서 핀별로 인터럽트 핸들러를 지정하거나 하는데,
이번 칩은 핀번호 짝수, 홀수핀으로 인터럽트 핸들러는 지정한다. ??

내가 했던 프로젝트 제품은 인터럽트를 2개를 받는데, 둘 다 짝수 번이었다. 그래서 EVEN 인터럽트 핸들러로만 동작한다. (PC02, PC04...). 다행히 2개의 핀 이 동시다발적으로 실행되지 않아 문제가 되지 않았지만, 다른 시스템에서는 이점을 조심히 봐야 할 것이다.


BLE를 이용하는 제품들 중 Nordic의 NUS 기능이 많이 사용되고 있다. BLE 이전의 classic bluetooth의 SPP를 BLE로 에뮬레이션 한 기능인데 상용제품에 많이 쓰이고 후발 BLE를 개발하는 CPU 사들이 해당 예제를 제공하고 있다. SiliconLab도 마찬가지인데, 문제는 스마트폰과의 연동 예제가 아닌 자사 제품끼리의 Server/Client 연동으로만 동작하는 한정적인 기능만 제공한다. 그래서 iOS/Android 향으로 포팅 하는데 생각보다 많은 이슈사항이 있었다.
우선 github에서 예제를 다운 받는다. (참고로 Simplicity Studio 5 기준으로 테스트하였다.)
1) setup_advertising_or_scanning
App.c 소스가 ble spp 예제 메인이며, 첫 번째로 손볼 함수는 setup_advertising_or_scanning이다.
수정전 소스
    app_log("%2.2x\r\r\n", address.addr[0]);
    // Pad and reverse unique ID to get System ID.
    system_id[0] = address.addr[5];
    system_id[1] = address.addr[4];
    system_id[2] = address.addr[3];
    system_id[3] = 0xFF;
    system_id[4] = 0xFE;
    system_id[5] = address.addr[2];
    system_id[6] = address.addr[1];
    system_id[7] = address.addr[0];

    sc = sl_bt_gatt_server_write_attribute_value(gattdb_system_id,
                                                 0,
                                                 sizeof(system_id),
                                                 system_id);
system_id[3],[4]에 0xff, 0xfe 부분을 주석 처리하고 2자리씩 당겨서 system_id를 8자리에서 6자리로 바꿔야 한다.
// Pad and reverse unique ID to get System ID.
		system_id[0] = address.addr[5];
		system_id[1] = address.addr[4];
		system_id[2] = address.addr[3];
		// system_id[3] = 0xFF;
		// system_id[4] = 0xFE;
		system_id[3] = address.addr[2];
		system_id[4] = address.addr[1];
		system_id[5] = address.addr[0];

		sc = sl_bt_gatt_server_write_attribute_value(gattdb_system_id,
									 0,
									 sizeof(system_id),
									 system_id);
2) send_spp_data 함수
데이터를 전달하기 위한 함수인데 MTU에 따라 그냥 써도 상관없으나, 이번 프로젝트에서는 20바이트씩 잘라서 보냈다.
어차피 데이터 양도 적으니까..
static void send_spp_data()
{
	uint16_t len /*= 0,i*/;
	uint8_t data[20];
	sl_status_t result/*, read_result*/;

	// Read up to _max_packet_size characters from local buffer
	if(!IsEmptyQueue(ENUM_BLE_SPP_RX))
	{
		for(len=0; len<20;)
		{
			if(IsEmptyQueue(ENUM_BLE_SPP_RX)) break;
			data[len++] = Pop_Queue(ENUM_BLE_SPP_RX);
		}

		do{
			result = sl_bt_gatt_server_send_notification(_conn_handle,
														 gattdb_gatt_spp_data,
														 len,
														 data);
			_sCounters.num_writes++;
		} while (result == SL_STATUS_NO_MORE_RESOURCE);
		sl_app_assert(result == SL_STATUS_OK, "[E: 0x%04x] Unexpected error\r\n",(int)result);

		_sCounters.num_pack_sent++;
		_sCounters.num_bytes_sent += len;
	}
	return;
}
3) sl_bt_evt_connection_opened_id
여기까지만 하면 통신 송수신은 문제없는데, 문제는 본딩이었다. 블루투스는 특정 기기와 본딩이라는 등록 절차(with 핀 코드)를 가지면 다음부터는 바로 연결이 가능하다. 본딩은 보안 때문에 필수 기능이다.
우선 아래 링크를 참조해서 siliconlabs의 ble 프로세스를 알아야 한다.
sl_bt_on_event 함수에서 sl_bt_evt_connection_opened_id 이벤트가 발생하면 sl_bt_sm_increase_security 함수를 호출해야 한다.
	// This event indicates that a new connection was opened.
	case sl_bt_evt_connection_opened_id:
		_conn_handle = evt->data.evt_connection_opened.connection;
		_bonding_handle = evt->data.evt_connection_opened.bonding;

		thin_printf(__func__, "--------------------------------------", PARA_TYPE_NONE, "\n\n");
		thin_printf(__func__, "Connected", PARA_TYPE_NONE, "\n\n");

		_main_state = STATE_CONNECTED;
		sc = sl_bt_advertiser_stop(advertising_set_handle);
		sl_app_assert(sc == SL_STATUS_OK,
					"[E: 0x%04x] Failed to stop the advertising\r\n",
					(int)sc);

		sc = sl_bt_connection_set_parameters(_conn_handle, 12, 20, 0, 200, 0, 0xFFFF);
		sl_app_assert(sc == SL_STATUS_OK,
					"[E: 0x%04x] Failed to request connection parameter update\n",
					(int)sc);

		sc = sl_bt_sm_increase_security(_conn_handle);
		break;
sl_bt_evt_connection_opened_id는 접속이 되었을 때 발생하는 이벤트인데, 클라이언트 측에서 connect를 하거나
안드로이드 os에서 장치 등록 등을 할 때 발생한다. 우선 본딩 절차를 하는 것이 기본 스펙이므로 security 레벨을 높인다.
만약 클라이언트의 블루투스가 4.2 미만이라면 해당 연결은 이루어지지 않는다.
(당연하지만 블루투스 4.2 미만의 스마트폰은 구하기 어렵다. 아이폰 6도 4.2이다.)
4) sl_bt_evt_gatt_server_characteristic_status_id
최신 소스를 보니 get_connection_security_mode 함수가 추가되었다. 그냥 시큐리티 레벨 값을 가져오는 것 같다. 그런데 내가 수정한 소스는 다음과 같다.
case sl_bt_evt_gatt_server_characteristic_status_id:
	{
		sl_bt_evt_gatt_server_characteristic_status_t pStatus;
		pStatus = evt->data.evt_gatt_server_characteristic_status;
		if (pStatus.characteristic == gattdb_gatt_spp_data)
		{
			if (pStatus.status_flags == gatt_server_client_config)
			{
				// Characteristic client configuration (CCC) for spp_data has been changed
				if (pStatus.client_config_flags == gatt_notification)
				{
					// Disable sleeping
					sl_power_manager_add_em_requirement(SL_POWER_MANAGER_EM2);

					// If not yet bonded, start authentication.
					if (_bonding_handle == 0xFF)
					{
						thin_printf(__func__, "--------------------------------------", PARA_TYPE_NONE, "\n");
						thin_printf(__func__, "Authenticating...", (int)__LINE__, 0, (uint8_t *)__FILE__, (PARA_TYPE_NUM|PARA_TYPE_STR), "\n");
						_main_state = STATE_AUTHENTICATING;
					}
					else
					{
			            if(securityLevel < 2){
			                _main_state = STATE_AUTHENTICATING;
			                thin_printf(__func__, "Need Bonding!", PARA_TYPE_NONE, "\n");
			            }else{
							thin_printf(__func__, "--------------------------------------", PARA_TYPE_NONE, "\n");
							thin_printf(__func__, "Already bonded.", PARA_TYPE_NONE, "\n");
							thin_printf(__func__, "Authentication not needed.", PARA_TYPE_NONE, "\n");
							thin_printf(__func__, "--------------------------------------", PARA_TYPE_NONE, "\n");
							thin_printf(__func__, "** SPP Mode ON **", PARA_TYPE_NONE, "\n");

							_main_state = STATE_SPP_MODE;
							// Disable sleeping when SPP mode active
							sl_power_manager_add_em_requirement(SL_POWER_MANAGER_EM2);
						}
					}
				}
				else
				{
					thin_printf(__func__, "** SPP Mode ON **", PARA_TYPE_NONE, "\n");
					thin_printf(__func__, "--------------------------------------", PARA_TYPE_NONE, "\n");
					_main_state = STATE_CONNECTED;
					// Enable sleeping
					sl_power_manager_remove_em_requirement(SL_POWER_MANAGER_EM2);
				}
			}
		}
우선 본딩 여부를 확인한다. if (_bonding_handle == 0xFF)에서 본딩 핸들 값이 ff 이면 아직 본딩 절차 중임으로 아무것도 하지 않는다. 본딩 값이 있어도 시큐리티 레벨이 낮으면 클라이언트와 서버 둘 중 하나의 본딩 값이 깨졌다는 의미가 되어 본딩 프로세스를 해야 한다는 뜻. 역시 아무것도 하지 않는다. 최신 소스로 한번 테스트는 해보겠으나 sl_bt_sm_increase_security 함수는 남발해서는 안 된다.
5) 본딩 관련
sl_bt_evt_sm_confirm_bonding_id, sl_bt_evt_sm_passkey_display_id, sl_bt_evt_sm_bonded_id는 원본 소스대로 처리한다. sl_bt_evt_sm_bonding_failed_id 이 발생한 경우는... 아래 링크를 참조했다.
[Deprecated] KBA_BT_1105: How to handle missing bonding keys (silabs.com)
case sl_bt_evt_sm_bonding_failed_id:
if (reason == SL_STATUS_BT_SMP_PAIRING_NOT_SUPPORTED || reason == SL_STATUS_BT_CTRL_PIN_OR_KEY_MISSING)
{
 if (_bonding_handle != 0xFF)
 {
	 thin_printf(__func__, "Broken bon", PARA_TYPE_NONE, "\n");
     sc = sl_bt_sm_delete_bonding(_bonding_handle);
     sl_app_assert(sc == SL_STATUS_OK,
				 "[E: 0x%04x] Failed to delete specified bonding information or whitelist\r\n",
				 (int)sc);

     sc = sl_bt_sm_increase_security(evt->data.evt_connection_opened.connection);
     sl_app_assert(sc == SL_STATUS_OK,
				 "[E: 0x%04x] Failed to enhance the security\r\n",
				 (int)sc);
   _bonding_handle = 0xFF;
 }
 else
 {
	 thin_printf(__func__, "Increasing security in one second", PARA_TYPE_NONE, "\n");
     uint16_t result;
     result = sl_bt_sm_increase_security(_conn_handle);
     app_log("Result... = 0x%04X\r\n", result);
     sl_app_assert(result == SL_STATUS_OK,
				 "[E: 0x%04x] Failed to enhance the security\r\n",
				 (int)sc);

   if (result == SL_STATUS_INVALID_STATE)
   {
	 app_log("Trying to increase security again");
	 sc = sl_bt_sm_increase_security(_conn_handle);
	 sl_app_assert(sc == SL_STATUS_OK,
				   "[E: 0x%04x] Failed to enhance the security\r\n",
				   (int)sc);
   }
 }
}
else _BLE_Close();
본딩을 지원하지 않거나, 본딩 키가 손상된 경우, 본딩 핸들 값에 따라 본딩 데이터를 삭제 후 보안레벨을 한 단계 올린다. 그 외의 이유로 본딩 실패가 발생했다면 그냥 연결 종료.
6) iOS 지원
신기하게도 iOS는 안드로이드와 다르게 연결된다. sl_bt_evt_gatt_server_characteristic_status_id에서 아래와 같이 해줘야 한다.
characteristic가 서비스 변경으로 들어온다. 나머지는 4)를 참조해서 하면 된다.
또 위 BLE 예제로 프로그램을 설계하게 되면 2가지 문제점을 가지게 된다. (위 수정사항 제외)
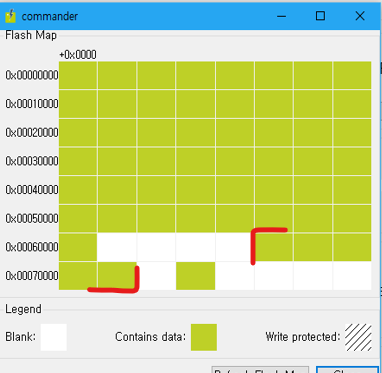
하나는 메모리 이슈이다. 본딩 정보를 내부 플래쉬에 저장해야 하는데 생각보다 많은 영역을 저장한다. 내 기억이 맞으면 linkerfile.ld 을 보면 플래쉬 영역 맨 뒤에 5블록을 사용한다. 그래서 실제 저장되는 영역을 줄어드니 이점을 감안해야 한다.
다른 하나는 블루투스 상태 처리 함수를 어느 주기마다 실행할지 지정해야 한다.
Ambiq나 ESP32는 블루투스가 콜백 이벤트가 발생해서 그때마다 처리하면 되는데 실리콘랩스는 그렇지 않다.
폴링으로 sl_system_process_action 함수를 실행해야 한다. 그냥 예제처럼 while 루프에서 실행하면 되는데,
다른 함수에서 장시간 대기를 하는 경우 sl_system_process_action 함수가 실행이 안 되어 블루투스가 먹통이 되는 경우가 발생한다. RTOS를 사용하지 않음으로 잘 설계해야 한다.
'개발이야기' 카테고리의 다른 글
| [gcc]키보드 입력 여부 확인하기 (0) | 2023.07.24 |
|---|---|
| [libcurl] ftp 업로드 (put) (0) | 2023.07.24 |
| EFR32BG21 BLE SPP 개발 (2부, GPIO, UART 등) (0) | 2023.07.03 |
| EFR32BG21 BLE SPP 개발 (1부, 프로젝트 구성) (0) | 2023.03.15 |
| [ESP32/idf] Panic, watchdog 이벤트 발생 시 참조할 사항 (1) | 2022.10.14 |


